16 Sep Labels In the Hoop
Posted at 12:21 pm
in Online Classes
Icon
- Select 120×120 hoop, turn on the grid
- Open Applique Creator
- Select square shape
- Size to about fill the hoop
- Select letters “A” and Curlz 12 for the name of quilt
- “Follow Your “ ok, move to top of hoop
- “Heart”
- Next two lines will be made by and the quilted by. You can create headings for each if desired
- Select fonts Curlz12 and type Sew-ciety
- SEW-CIETY, Hide keyboard, select ok. Select edit and rotate
- Move under Heart
- Select fonts and embroidery fonts, , this will take you directly to sequencing
- Select comic 12 and type in Quilted by: Hide keyboard, select ok. Select edit and rotate.
- Rotate using the 90 degree in center of control wheel until word is horizontal.
- Select fonts, Curlz 12 and type in Bonnie C.
- Adjust lettering as desired
- Select stitch out mode and go!
EPIC 2
- Embroidery, start new
- Hoop size 120×120, turn on the grid
- Select Design Applique (flower on bottom bar)
- Shape menu, select square
- Stitch type select wide candlewick, touch check mark to close
- Drag from a corner to size to hoop
- Select “A” for fonts and select Belle 10
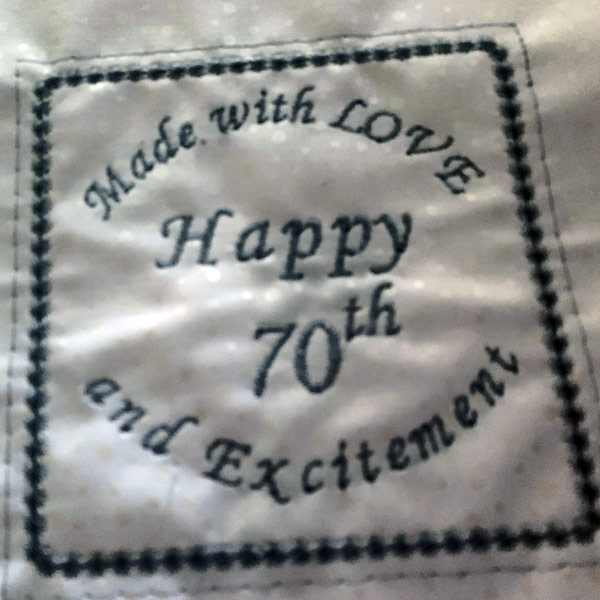
- Type in “Made with Love” and select arch over from text shape, check mark to close and move to top area of hoop
- Repeat, using Belle 10 and type in “and Excitement”, text shape arch under, check mark to close and move to bottom of hoop
- Select Belle 15 and type “Happy” and check mark to close. Move up and under made with
- Select Belle 15 and type 70, check mark to close, enlarge slightly using the green corners
- Select Belle 10 and type “th” check mark to close, move by the 70, check mark to close
- Fine turn label to get spacing you like
Stitch Out Tips
- Best Press label fabric
- Fuse to cutaway
- Place another layer of cutaway in the hoop
- Lay fabric on top of hoop and stitch step one of applique process (three steps)
- Do not trim at this time
- Select monochrome if you want all one color, turn off trim commands if desired
- Remove from hoop
- Sewing mode, thread up with Vanish Thread in top and bobbin. Keep them in a ziplock when not using. Mark V on your bobbin……..
- Place muslin on top of label , pin in place
- From the wrong side of label stitch close to satin stitch.
- Carefully slit the muslin so you can turn
- Finger press or iron (no steam) until you have a crisp edge
- Take a wet qtip and run along the stitch you just did. Vanish will dissolve, pull away muslin
- Find someone to hand stitch label to back of quilt.

