11 Aug Viking/Pfaff Techniques – Apron
July EPIC, Pfaff & Viking Technique Class
Sew-Ciety, 1025 South Perry St Unit 101B, Castle Rock, CO 80104
by Judy Keating
Download Class PDF and Download Machine File (ZIP format)
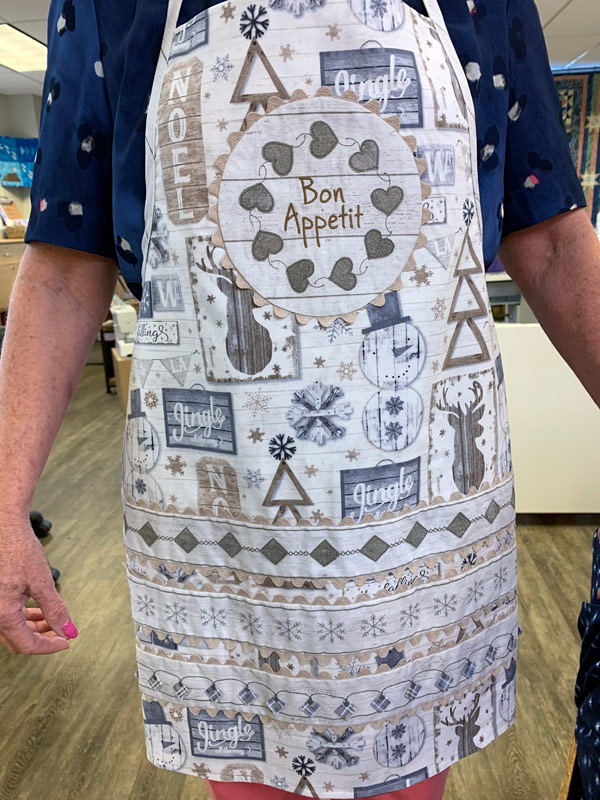
“Bon Appetit” Apron
CLASS NOTES IMPORTANT PLEASE READ
The instructions for this project were written for the Viking Epic. The project can also be done on the Pfaff Icon with a few adjustments.
The design for the circular applique is being sent to you since the heart applique stitches are unique to the Viking. Once the design was created on the Epic and saved as an embroidery design, it can be stitched out on the Pfaff as an embroidery. Turn the automatic thread cutter completely OFF when stitching out this embroidery design on both Viking and Pfaff!!
The Viking and Pfaff use different formats for stitches in the sewing mode so the dimensional stitches that were used on the bands at the bottom of the apron are unique to the Viking and cannot be used on the Pfaff in sewing mode. However, there are plenty of decorative stitches on the Pfaff that can be used on the bands. For instance, the stacking stitches or the ribbon stitches. Viking owners are free to chose any of the dimensional stitches instead of the ones indicated in the instructions. The sample apron has stitches from both the Viking and the Pfaff.
The Circular Attachment:
The circular attachment was used to apply the rick rack to the embroidered circle without cutting the circle out as directed in the instructions. The circle on the sample apron is a bit larger than the circle printed in the instructions. You will use tear away stabilizer under the embroidered piece.
When using the circular attachment, you must be gentle and just guide the fabric as it is being sewn. Any pulling on the fabric can cause the pin to dislodge from its setting.
If you do not have a circular attachment but have a Wish version of a Sew Steady table, it came with a circle making attachment which could be used.
The “Easy” way to make a shaped applique:
After the rick rack has been sewn to the embroidered piece and is still in place on the circular attachment, place a piece of fusible cutaway mesh stabilizer on the right side of the embroidered piece with the fusible side against the embroidery. Stitch the circle again to attach the stabilizer to the embroidery.
Remove the sewn piece from the circular attachment and trim a seam allowance of 1/4″ on the fabric and the stabilizer. Be careful to not trim the rick rack. It is not necessary to clip the seam allowance.
Cut a slit about 1 1/2″ – 2” long in the center of the stabilizer. Turn the applique right side out through the slit. The fusible side will now be on the outside. If you used fusible interfacing DO NOT IRON!!! Just finger press the edge seam!!
Pin the applique in place on the apron and now you can press it to the apron. You may want to press from the wrong side to avoid mashing the embroidery. Then stitch around the circle between the fabric and the rick rack.
In the instructions, it said to cut your fabric for the binding and ties on the straight of grain across the width of the fabric. The supply sheet indicated that the fabric for the binding and ties should be cut on the bias in order to be applied smoothly to the armhole curves.
The instructions direct you to place the 1st band 3” from the bottom of the apron. The 2nd and 3rd bands are placed about an inch apart above the 1st band. The inch is measured from the edges of the band fabric ignoring the rick rack.
The apron is lined to avoid having to deal with hemming the ends of the bands at the bottom as well as to give the apron a bit more stability and body.
When choosing decorative stitches for the bands, consider that you will have to remove the tear away stabilizer before attaching the bands to the apron. The snowflakes on the sample apron are cute but it took a bit of extra time to remove the stabilizer without destroying the stitching.
If you do not have the quilt binder attachment for putting the ties and binding on, you may want to make your binding using the Sashers or by just ironing it like a double fold bias tape. Be careful to not stretch it when ironing since it is cut on the bias.
